Here’s the official CHK Spring Cleaning eBook and it’s free. Published in 2011, it’s still pertinent and helpful for getting your house in order.
Enjoy!
Sylvia

...a God to serve...a family to love... a work to do...
Here’s the official CHK Spring Cleaning eBook and it’s free. Published in 2011, it’s still pertinent and helpful for getting your house in order.
Enjoy!
Sylvia
Brine seasonings
Basic Brine:
Dissolve 1 cup table salt or 2 cups kosher salt in 2 gallons of cold water in a large stock pot or clean, food safe bucket.
After you immerse the turkey in the brine, you can add any seasonings and flavors and allow it to brine for 12 to 24 hours.
I mostly use this seasoning: Traditional Turkey Brine Seasoning
1 to 2 tablespoons of each:
Garlic powder
Onion Powder
Celery seed, ground
Sage
Thyme
Fresh ground black pepper
After the turkey is brined, you should rinse it off and dry it with a clean cloth. You can coat the skin with soft butter before roasting. Roast at 400 degrees F for 35 minutes then reduce the heat to 350 degrees for the remaining roasting time.
For more turkey tips and recipes you can download my Thanksgiving Planner, it’s free!

We use a lot of dried beans here. Sometimes I cook them with a piece of ham or other cured meat. Mostly though I use them as an ingredient in other dishes like chili or soup.
Dried beans are one of the most economical items you can home can. They’re getting expensive in the stores right now so stock up and plan to preserve them by canning some. Canning dry beans does require a pressure canner.
This is not a tutorial on how to use a pressure canner.
If you don’t know how to use one or don’t have one, you’ll need to get that taken care of before canning dried beans. I’ll give instructions for using my Pressure Canner which is a Mirro 23 quart Pressure Canner, and you can take it from there.
An important thing to remember when pressure canning ANYTHING: Time your canning according to the ingredient that needs the most time. So if you put meat in your dried beans, you can them as long as you would a whole quart or pint of meat.
There are several methods you could use to home can dried beans.
Soak, cook, can
In this method you soak the beans in water eight hours or overnight. Then you rinse the beans and put them in clean water and cook them. Finally, you can the cooked beans. I am not personally fond of this method because it cooks the beans twice and they are very mushy. If you like mushy beans, for example if you were going to do nothing with these beans but make re-fried beans, this method might be the best for you.
No-soak, can
This method is definitely the easiest. It works just fine, BUT I can never really work out how much water to add to the beans especially if I have meat in the jars taking up some of the space. I usually end up with lots of water and not enough beans. I’ve experimented with this method a lot and I CAN do it, but I prefer the next method. If you need fast, easy, uncomplicated method, try this one.
Soak, can
This is my go-to method for canning dried beans. I like the soak time, it gives the beans a great texture after they have cooked in the jars. This is the method that I have consistent success with. They’re not mushy. Plus, after soaking I can add meat and I know the beans aren’t going to swell up much more in the jars so I know how much water to use.
Here are instructions for Method #3: Soak, Can.
My Mirro 22 quart Pressure Canner hold 7 quarts. So to fill 7 quarts with beans I’ll use 2 pounds of dried pintos. Its hard to estimate how many dried beans you need for canning because beans dry at different rates. But a rule of thumb is 2 pounds for every 7 quarts of finished beans.
First, wash your beans. Dried beans are an agricultural product so they’re going to have soil, bugs, twigs, rocks, in them. Wash them in clear water and rinse them. Pick through them while you’re washing to remove debris. Beans that float are probably OK but the ones that are discolored should be removed and discarded.
Now that you’ve got your beans washed, put them in a big bowl or pan that is twice as big as you have beans, at least. Cover the beans with water by several inches and check on them throughout the day or before you go to bed if you’re soaking them overnight. They will soak up a lot of water and you may need to add more.
After the 8 hour or over-night soaking time, pour off the water and get your jars and canner ready.
Your lids, rings and jars should be hot. I put them in a saucepan on the oven.
Get a big kettle or pot of water boiling to put in the jars after adding the beans.
I put 3 inches of water in my Mirro 22 quart Pressure Canner and start getting it hot while I prepare the beans in the jars.
In each quart jar you’ll put 1 teaspoon of salt, 2 cups of soaked beans and a chunk of cured meat, if using. This much salt seasons the beans well. If you think you need them to be less salty for recipes, decrease the amount to 1/2 teaspoon.
If you use pints, you’ll use 1/2 teaspoon of salt and 1 cup of soaked beans in each jar, plus the chunk of meat, if using.
Next, pour boiling water over the beans and meat in each jar, leaving a 1 inch headspace. this water doesn’t HAVE to be boiling but I think it gives the beans a good head start and shortens the heating up process a little.
Wipe the mouths of the jars clean and dry with a clean cloth. Add the hot lids and rings. Tighten the rings just hand tight don’t force it tight.
Put the jars in the pressure canner, I use a rack and I weave a clean cotton cloth between the jars to keep them from bumping into one another and breaking. That doesn’t always happen but I’ve done it a few times so the cloth is a must in my opinion. It works.
Close and lock the Pressure Canner
After you have locked and vented the canner, let it process.
If you have never pressure canned, find someone who has to do it with you first, that’s my suggestion, any way. I pressure canned by myself with my Mother on the phone the first time.
Process these quarts of dried beans with meat for 90 minutes. If you happen to use pints process them for 75 minutes after venting. This is according to the National Center for Home Preservation at the University of Georgia.
After the canning time is up, remove the canner from the heat and let it naturally depressurize. Don’t remove the weight yet. If you do, you risk all the liquid being sucked out of the beans.
When the canner is decompressed, remove the jars and let them cool on the countertop. They’ll still be really hot, probably boiling, so be very careful.
After they cool check to see that the lids are all popped downward and then you can store the jars.
Last September I harvested a bunch of apples. I think the varieties were Red and Golden Delicious and a few Granny Smith. I dehydrated them and canned a bunch too. I made apple pie filling and canned that. I’ll put a recipe for that here soon.
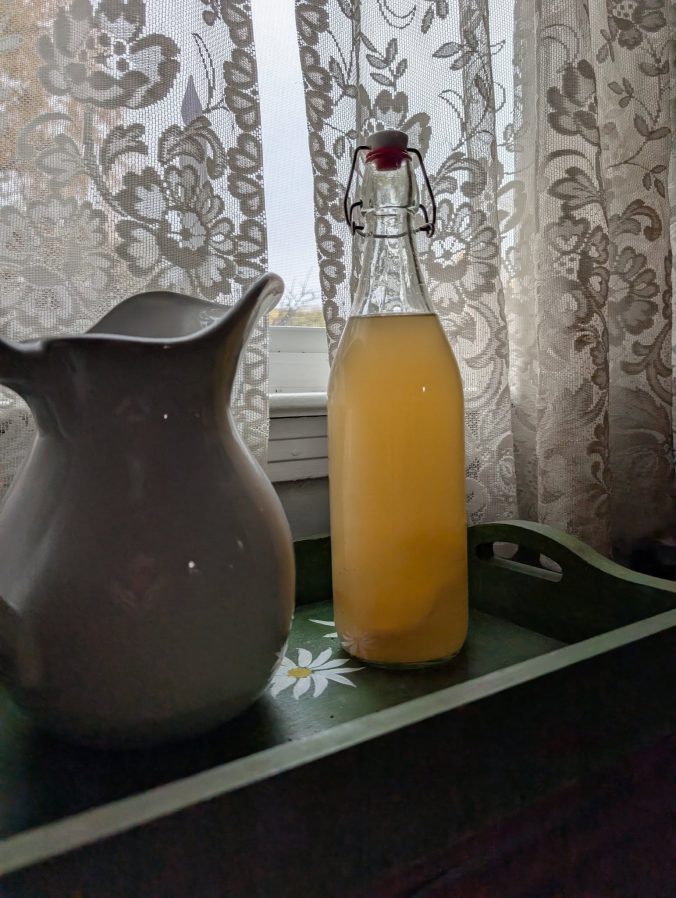
With the peelings and cores I made apple cider vinegar. It’s super simple. I filled a 2 quart jar with the peels and cores, covered them with pure water and covered it with a piece of paper towel held down with a canning ring.
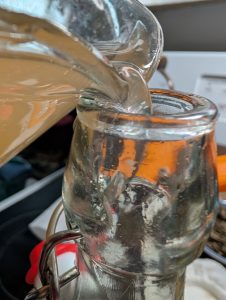
I left this in my herbal cabinet for 2 1/2 months, checking it every couple of weeks. A few days ago I saw that it was developing a mother! Then today I removed the mother to a bottle and strained out the vinegar into the bottle with the mother. That’s all there was to it.
It smells delicious. I’m so happy to have 2 quarts of this wonderful vinegar. Here are a couple of photos. I hope you will try to make apple cider vinegar the next time you peel a few apples!
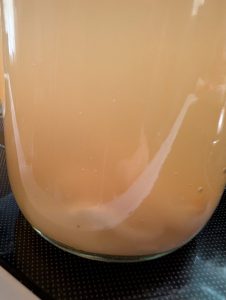
You can just barely see the mother in the bottom of the bottle
This link will take you to a copy of the Christian Homekeeper Thanksgiving Planner. It’s free! I hope it helps you plan your Thanksgiving. God bless you!

The key to a great homemade Ranch Dressing is FRESH ingredients. I make this recipe all summer long. Even my non-ranch dressing loving husband enjoys it.
1/2 cup plus 2 tablespoons mayonnaise
1/2 cup sour cream
1/2 cup buttermilk or regular milk
1 tablespoon fresh lemon juice or white wine vinegar
1 to 2 teaspoons Worcestershire sauce, to taste, this is optional but it really lends a nice flavor
1/4 cup fresh dill, finely chopped
1/4 cup fresh parsley, finely chopped
1/4 cup fresh chives, finely chopped
1/2 teaspoon onion powder
1/2 teaspoon garlic powder
1/4 teaspoon fine sea salt, plus more to taste
1/4 teaspoon fresh ground black pepper
Mix everything well. I mix it in a widemouth pint Mason jar. Cover and refrigerate to mellow.
Lemon Balm (Melissa officinalis) is one of my favorite herbs. It’s in the mint family so it has a square stem and a lovely fragrance. It’s leaves have a distinctive lemony aroma and it tastes so good in teas. Sometimes it will have either pale pink or whiteish flowers.
There are a lot of uses for Lemon Balm but I’ll just share what I use it for. Remember though that I am not a health care professional, read my disclaimer page located in the right sidebar.
Lemon Balm contains a isomer called citral. It’s similar to citronella which keeps insects away. Lemon Balm is a good natural insect repellant. So you can keep a pot of it on your deck, porch or pool to help with that. If you put it in the ground to grow, it will soon take over your whole garden. That’s why most people grow mint in big pots. The pots can be set into the ground if desired but the mint will grow over the edges of the pot into the ground!

It also contains a chemical called rosmarinic acid. This chemical works to give relief from anxiety and nervousness. Lemon Balm does have a calming effect when used in a tea. It’s a lot like chamomile in how gently it works.
Another thing that Lemon Balm is good for is digestion. If you have a little trouble with indigestion after eating, a cup of Lemon Balm tea can really help. Like most mints it contains menthol which has a relaxing effect on the muscles of the digestive tract.
To get the benefits of it’s calming effect or muscle relaxing effects, I make a tea using about 2 teaspoons of dried Lemon Balm, 1 or 2 teaspoons of honey and 6 ounces of very hot, but not boiling, water. Let it steep for 5-8 minutes. I would drink this 3 or 4 times a day to get good relief. You don’t need to sweeten it if you’d rather not, it’s very tasty by itself. You don’t want to use boiling water on herbs, it destroys a lot of the helpful chemicals in the herbs.

Lemon Balm is good as a tea because it has that lemony-minty flavor, but you can also add it to any other tea for a nice, bright lift in the flavor. I enjoy adding some dried Lemon Balm to my English Breakfast tea.
Ideally, Lemon Balm, and most all other herbs, should be cut in the morning before the heat of the day takes over. In the morning the essential oils in the herbs are at their peak. Try not to wash them before drying them, just shake them off, pull off any dead or brown leaves and pull off anything that isn’t herb.
I dry Lemon Balm at 95 degrees F for about 6 hours. Depending on how moist the herb is, it could take a longer or shorter time. After it’s dried I chop it up in my food processor and store it in a glass jar.

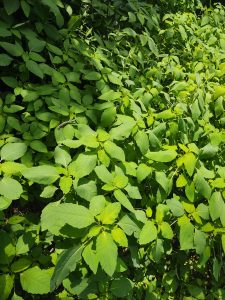
Jewelweed – Impatiens capensis, also known as Spotted Touch Me Not
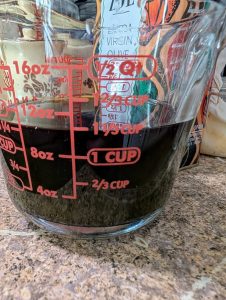
Jewelweed oil made with olive oil
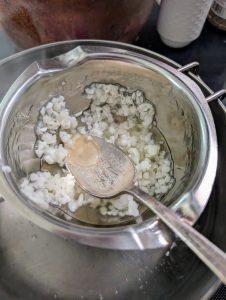
Beeswax
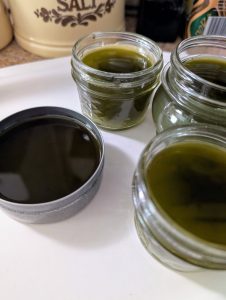
Jewelweed salve while it was still hot and in a liquid state.
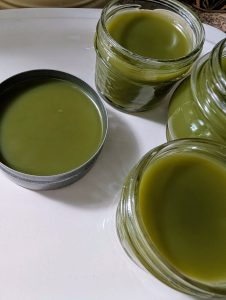
Solidified jewelweed salve, cooled and ready for the lids
 Hello and welcome! I'm Sylvia Britton, and I've been online since 1996 offering encouragement and help in the spirit of Titus 2 and Proverbs 31 at Christian Homekeeper. CHK is the original Homekeeping site on the internet. There have been a few knockoffs of the name, but this is the original.
© 2026 The Christian Homekeeper
Theme by Anders Noren — Up ↑